How To: Create Users and Grant Permissions in MySQL

Introduction to Permissions in MySQL

MySQL is a database application for Linux and part of the popular LAMP stack (Linux, Apache, MySQL, PHP). A MySQL installation includes options of managing through a root user or specific user accounts.

Managing user credentials in MySQL can be a time-consuming task, particularly when dealing with numerous MySQL instances spread across multiple servers. 

In this article, we’ll be reviewing how to do the following: 

  • How to create users in MySQL
  • How to grant user permissions in MySQL
  • How to revoke user permissions in MySQL

MySQL Databases and Users

Once you have MySQL installed on the server(s) that will host your MySQL environment, you need to create a database and additional user accounts. In order to run the following commands, log into the MySQL instance with the MySQL root account.

Create MySQL databases 

Creating a MySQL database involves a few simple steps. Here’s a step-by-step guide to creating a new MySQL database:

1. Create a New Database:

Now that you are connected to MySQL, you can create a new database using SQL commands. In the MySQL command-line client or phpMyAdmin, use the following SQL statement to create a new database (replace “Apono_database” with the desired name of your database):

  CREATE DATABASE Apono_database;

2. Verify the Database Creation:

To ensure that the database was created successfully, you can check the list of databases. In the MySQL command-line client, use the following command:

  SHOW DATABASES;

3. Use the New Database (Optional):

If you want to work with the newly created database, you need to switch to it using the following command in the MySQL command-line client:

  USE Apono_database;

That’s it! You have now successfully created a MySQL database. You can start creating tables and inserting data into it to build your application or manage your data. Remember to handle database credentials and access permissions with care to maintain security.

Create MySQL users

Creating a MySQL database involves a few simple steps. Here’s a step-by-step guide to creating a new MySQL database:

1. Install MySQL:

If you don’t have MySQL installed on your system, you need to install it first. You can download the MySQL Community Server from the official MySQL website: https://dev.mysql.com/downloads/

2. Start the MySQL Server:

Once you have MySQL installed, start the MySQL server. The process for starting the server varies depending on your operating system. On most systems, you can start the server using a command or by starting the MySQL service.

3. Connect to MySQL:

After the server is running, you need to connect to it using the MySQL command-line client or a graphical tool like phpMyAdmin.

– For the command-line client, open a terminal or command prompt and type:

  mysql -u root -p

  You will be prompted to enter the MySQL root password.

– For a graphical tool like phpMyAdmin, open a web browser and navigate to the phpMyAdmin URL. You can log in using your MySQL root credentials.

4. Create a New Database:

Now that you are connected to MySQL, you can create a new database using SQL commands. In the MySQL command-line client or phpMyAdmin, use the following SQL statement to create a new database (replace “Apono_database” with the desired name of your database):

  CREATE DATABASE Apono_database;

5. Verify the Database Creation:

To ensure that the database was created successfully, you can check the list of databases. In the MySQL command-line client, use the following command:

  SHOW DATABASES;

6. Use the New Database (Optional):

If you want to work with the newly created database, you need to switch to it using the following command in the MySQL command-line client:

  USE Apono_database;

That’s it! You have now successfully created a MySQL database. You can start creating tables and inserting data into it to build your application or manage your data. Remember to handle database credentials and access permissions with care to maintain security.

How to Grant Permissions in MySQL

To grant permissions in MySQL, you’ll need to have administrative privileges or the GRANT OPTION privilege on the database you want to modify. Here are the steps to grant permissions to a user in MySQL:

1. Connect to MySQL: Open a terminal or command prompt and connect to MySQL using a user account with administrative privileges. For example:

   mysql -u root -p

   You will be prompted to enter the password for the ‘root’ user or the administrative user you provided.

2. Select the database: If you want to grant permissions for a specific database, first select it using the following command:

   USE Apono_database;

3. Grant the permissions: Now, you can grant various privileges to the user using the `GRANT` statement. The basic syntax is as follows:

   GRANT privilege_type ON database_name.table_name TO 'user'@'host';

   Replace `privilege_type` with the specific privileges you want to grant. Here are some common privileges:

   – `SELECT`: Allows the user to read (SELECT) data from tables.

   – `INSERT`: Allows the user to insert new rows into tables.

   – `UPDATE`: Allows the user to modify existing rows in tables.

   – `DELETE`: Allows the user to remove rows from tables.

   – `CREATE`: Allows the user to create new tables or databases.

   – `DROP`: Allows the user to delete tables or databases.

   – `ALL PRIVILEGES`: Grants all privileges on the specified objects.

   Replace `database_name.table_name` with the specific database and table (or `*` for all tables) where you want to grant the privileges.

   Replace `’user’@’host’` with the username and the host from which the user will connect. For example, `’john’@’localhost’` refers to the user ‘john’ connecting from the same machine as the MySQL server.

   For example, to grant SELECT, INSERT, UPDATE, and DELETE privileges on all tables of a database called ‘exampledb’ to a user ‘exampleuser’ connecting from ‘localhost’, you would use the following command:

   GRANT SELECT, INSERT, UPDATE, DELETE ON exampledb.* TO 'exampleuser'@'localhost';

4. Apply the changes: After executing the `GRANT` statement, you need to apply the changes for them to take effect:

   FLUSH PRIVILEGES;

5. Exit MySQL: When you’re done granting permissions, exit the MySQL command line interface by typing:

   EXIT;

The user ‘exampleuser’ should now have the specified privileges on the ‘exampledb’ database or the specified tables within it. Make sure to grant the appropriate permissions based on your application’s requirements to ensure security and access control.

How to Revoke Permissions in MySQL

To revoke permissions in MySQL, you can use the `REVOKE` statement. This allows you to remove specific privileges from a user or role. Here’s how you can do it:

1. Connect to MySQL: Open a terminal or command prompt and connect to MySQL using a user account with administrative privileges. For example:

   mysql -u root -p

   You will be prompted to enter the password for the ‘root’ user or the administrative user you provided.

2. Select the database: If you want to revoke permissions for a specific database, first select it using the following command:

   USE Apono_database;

3. Revoke the permissions: Now, you can revoke specific privileges from the user using the `REVOKE` statement. The basic syntax is as follows:

   REVOKE privilege_type ON database_name.table_name FROM 'user'@'host';

   Replace `privilege_type` with the specific privileges you want to revoke. These should match the privileges you previously granted to the user. For example, if you previously granted SELECT, INSERT, UPDATE, and DELETE privileges, you would use the same list of privileges in the `REVOKE` statement.

   Replace `database_name.table_name` with the specific database and table (or `*` for all tables) from which you want to revoke the privileges.

   Replace `’user’@’host’` with the username and the host from which the user was connecting. For example, `’john’@’localhost’` refers to the user ‘john’ connecting from the same machine as the MySQL server.

   For example, to revoke SELECT, INSERT, UPDATE, and DELETE privileges on all tables of a database called ‘exampledb’ from a user ‘exampleuser’ connecting from ‘localhost’, you would use the following command:

   REVOKE SELECT, INSERT, UPDATE, DELETE ON exampledb.* FROM 'exampleuser'@'localhost';

4. Apply the changes: After executing the `REVOKE` statement, you need to apply the changes for them to take effect:

   FLUSH PRIVILEGES;

5. Exit MySQL: When you’re done revoking permissions, exit the MySQL command line interface by typing:

   EXIT;

That’s it! The user ‘exampleuser’ should no longer have the specified privileges on the ‘exampledb’ database or the specified tables within it. Make sure to carefully revoke only the permissions that are no longer necessary, to maintain proper access control and security.

Conclusion

You should now be able to create, modify, delete users and grant permissions in a MySQL database.

Remember, to improve security and limit accidental damage it’s important to limit users only to the privileges required for their jobs.

Check out our article about Just-in-Time Access to Databases. 

Permissions in MySQL

Enabling MongoDB Authentication Post-Setup

When enabling MongoDB Authentication post-set up, it’s important to do the following things if you want to avoid downtime.

Introduction: Productivity versus Security

Organizations must strike a balance between enabling employees to be productive and efficient while ensuring that access to sensitive information and resources is adequately protected. 

On one hand, productivity is crucial for organizations to remain competitive and achieve their goals. Employees need access to various systems, data, and tools to perform their tasks efficiently. Restricting access too much or implementing overly stringent security measures can hinder productivity and impede workflow.  

On the other hand, permission security is necessary to safeguard sensitive information, prevent unauthorized access, and mitigate the risk of data breaches or other security incidents. Organizations need to implement access controls, user permissions, and authentication mechanisms to ensure that only authorized individuals can access specific resources. These security measures help protect confidential data, intellectual property, and other critical assets from unauthorized use or disclosure.

Finding the right balance between productivity and permission security involves careful consideration and risk assessment.

Background: DB Access That is Not Authorized or Authenticated

When using a VPN or VPC, it’s easy to think that you don’t need any authentication or ways to enable authorization. After all, it is a private network. And, when it comes to productivity, manual provisioning takes time and needs constant oversight. It’s easy to see why so many companies choose to forgo security in favor of productivity. 

However, as these companies grow, they need to implement security measures and be compliant–all without interrupting productivity.

“Companies want to restrict access; they don’t want everyone to have access without a user password. Rather, companies want to make sure that people have different levels of access without hurting the R&D productivity.”

– Rom Carmel,
CEO and Founder, Apono

Method for Access Control: Adding User Passwords Post Set-up

For the many companies that didn’t set up authorization in MongoDB at the very beginning, it’s not too late. Setting it up after transitioning to the cloud is not impossible, but it does take some know-how. 

  • Identifying Your Users
    • To be able to identify who the user is, you first need the connection string to get the username and password for your database user. If there is none, you can create a new database user to obtain these credentials. 
  • Enabling Authorization in MongoDB
    • MongoDB does not enable access control by default. DBAs can enable authorization using the –auth or security.authorization setting. When you enable authentication, this also automatically enables client authorization. Enabling access control on a MongoDB deployment enforces authentication. With access control enabled, users and applications are required to identify themselves and can only perform actions that adhere to the permissions granted by the roles assigned to their user.
MongoDB Authentication
  • Enabling MongoDB Authentication
    • Enabling authentication in MongoDB is necessary for user passwords to be recognized and read. But once you enable it, you’re breaking the way that everything works today, such as accessing MongoDB without a username or password.

Problem: MongoDB Authentication Breaking the Way Everything Works.

It’s not only people who need to access MongoDB to be affected; it’s also applications. So, in effect, none of the applications can access that MongoDB either.

Enabling authorization post-set up will break how teams work unless it’s done smartly.

How We Solved the Transition to MongoDB Authentication

It’s important to run the mongoDB with TransitiontoAuth enabled, which allows for accepting of  both authenticated and unauthenticated connections. Clients connected to the mongoDB during the transition state can perform read, write, and administrative operations on any database, so it’s important to remember to disable the feature after transitioning. 

This transition puts the company in an in-between state that allows access two ways: ones with user password connection strings and ones without. So, essentially you’re not really restricting any access because you can access it also without the user password. However, you are now starting to log and can therefore see who  hasn’t moved to using a password yet.

“You don’t want to just disable it before you’ve seen that all the people and applications who use and access that MongoDB have shifted to moving to working the new way.”

Rom Carmel

Conclusion: When in transit mode you should start working with Apono

Without Apono, it’s necessary for companies to create their own users and their own policies to these. But with Apono, they don’t need to do that. They can ask for what they need, and it’s automatically granted. How? When someone asks permission for a user, Apono goes inside the Mongo, creating a policy that will fit those needs, and giving the requestor a user. Then that user can be utilized to connect the model when the authentication is turned off. 

What We Learned at KubeCon Europe

Our team had an amazing time at Kubecon Amsterdam, connecting with DevOps and developers from around the world and showcasing our permissions management automation platform—Apono. 

We were thrilled to see the excitement and interest in our solution, as attendees recognized the need for better permission management in their organizations—from a security, time-saving and compliant perspective.

In addition to showcasing Apono at the conference, we also held several technical sessions to help attendees learn how to automate permission management. These sessions covered a range of topics, from gaining access visibility in K8s clusters to creating incident response access flows for on-call groups.

A few take-ways from our team at Kubecon:

“I realized that even a developer can sell when his product brings real value.”

Dima – Software Team Lead @ Apono

“I learned that the best way of getting someone attention is with a nerf-gun, hacky sacks and old-school arcade games – I’m definitely in the right industry” 

Roey – Head of Marketing @ Apono

“I discovered that everyone needs Apono, it does no matter if it is a big company or small, as long as you need to keep your customer data safe, you will need JIT permissions to all your cloud assets, DBs, K8s, and R&D applications.”

Tamir – Senior Director of Technical Services @ Apono

“I learned that you can put thousands of developers in one room and no tragedy will happen. Also, there is no such thing as too many socks!”

Ofir – CTO & Co-founder @ Apono

“Kubernetes is everywhere and permissions in K8s is a tedious thing to manage, especially when trying to do it “right” and granular. Even just understanding who has what permissions in a cluster is not as straightforward as one might think”

Rom (CEO & Co-founder @ Apono)

Workshop in the conference – Apono at Kubecon Europe

Overall, Kubecon Amsterdam was a fantastic opportunity to meet like-minded individuals who share our passion for innovation for k8s in the cloud-native space. 

We look forward to continuing to develop solutions that help organizations better manage their cloud environments and improve their security posture.

Temporary Access To Cloud SQL

CloudSQL Access Controls

Securing the development environment is a critical challenge for DevSecOps teams that must navigate multiple cloud environments and technologies. To improve collaboration between developers, security professionals, and IT operations staff, we need to provide secure access to physical networks and services—which often include providing elevated levels of permissions for databases such as CloudSQL. Ultimately, you should come away with an understanding of how to securely grant developers increased privileges in their public cloud Cloud SQL environments without sacrificing any security posture or control.


Managing Permissions in CloudSQL

This blog post will explore how to efficiently manage secured elevated permissions to Cloud SQL, an enterprise database service offered on Google Cloud Platform. With Apono strategies, you can make sure that only those who need it have access to the right information while minimizing both project overhead and organizational risk. Let’s dive in!


Using Apono To Provide Temporary Access to CloudSQL

Your first step in create an Apono account, you can start your journey here.

Follow the steps at our CloudSQL Integration Guide.

Now that Apono is set you can start creating Dynamic Access Flows:

  • Automatic Approval Access Flows – Using admin defined context and pre defined role to provide automatic access to CloudSQL resources.
  • Manual Approval Access Flows – Using admin defined context and pre defined role to provide automatic access to CloudSQL resources.


Using Apono declarative access flow creator you will be able to simply define:

  • Approvers
    • User Group (round-robin)
    • Single User
    • Automatic – Contextual
  • Requesters
    • User Group
    • Single User
  • Resource
    • Single Resource
    • Pre-Defined Resource Group
    • Partition of a resource
  • Duration
    • By Hours
    • By Days
    • Infinite

Example: Cloud SQL Automatic Approval Access Flow:

Temporary Access To CloudSQL

Example: Cloud SQL Manual Approval Workflow:

Temporary access to Cloud SQL allows you to specify a predetermined period during which certain IP addresses or IP ranges are permitted to connect to the database. Once the defined duration expires, access to the instance is automatically revoked.

The temporary access feature is particularly beneficial when you require short-term access for specific purposes, such as granting temporary database privileges to third parties or clients. By employing temporary access, you can avoid the need to permanently add unfamiliar IP addresses to the instance’s authorized network list, bolstering the overall security of your Cloud SQL deployment.

The duration of temporary access can be customized to meet your requirements, ensuring that connectivity is available for an extended period. This flexibility allows you to accommodate projects or collaborations that demand longer-term access to your Cloud SQL instance. Once the designated period concludes, the system will automatically remove the authorized access, safeguarding your database from unauthorized connections.


Streamlined Access. Frictionless Security.

With Apono, companies satisfy customer security requirements and dramatically reduce attack surfaces and human errors that threaten commerce. Apono liberates DevOps teams to deliver more for customers and the businesses without delay.

Temporary Access To PostgreSQL

PostgreSQL Access Controls

PostgreSQL is a widely popular relational structured database management system, PostgreSQL authorization is an ongoing process that checks each command, comparing it with the users account role and its associated privileges.


Managing Permissions in PostgreSQL

In the era of DevSecOps, ease of access and secure management of resources is essential to facilitating collaboration among development teams. Providing developers with elevated access to PostgreSQL can be a critical step in speeding up product development cycles while maintaining necessary security protocols. For an organization that has many users accessing different databases, granting individual user accounts exclusive privileges can be cumbersome and overwhelming. With this blog post, we will explore best practices involved in setting up privileged PostgreSQL accounts for developers while protecting core assets from unauthorized or careless use.


Using Apono To Provide Temporary Access to PostgreSQL

Your first step in create an Apono account, you can start your journey here.

Follow the steps at our PostgreSQL Integration Guide.

Now that Apono is set you can start creating Dynamic Access Flows:

  • Automatic Approval Access Flows – Using admin defined context and pre defined role to provide automatic access to PostgreSQL resources.
  • Manual Approval Access Flows – Using admin defined context and pre defined role to provide automatic access to PostgreSQL resources.


Using Apono declarative access flow creator you will be able to simply define:

  • Approvers
    • User Group (round-robin)
    • Single User
    • Automatic – Contextual
  • Requesters
    • User Group
    • Single User
  • Resource
    • Single Resource
    • Pre-Defined Resource Group
    • Partition of a resource
  • Duration
    • By Hours
    • By Days
    • Infinite

Example: PostgreSQL Automatic Approval Access Flow:

Temporary Access to PostgreSQL

Example: PostgreSQL Manual Approval Workflow:


Streamlined Access. Frictionless Security.

With Apono, companies satisfy customer security requirements and dramatically reduce attack surfaces and human errors that threaten commerce. Apono liberates DevOps teams to deliver more for customers and the businesses without delay.

Temporary Access To MySQL

Temporary Access to MySQL – Apono Access Automation

Intro

MySQL is a widely popular relational structured database management system, MySQL authorization is an ongoing process that checks each command, comparing it with the users account role and its associated privileges.


MySQL Access Controls

For many DevOps professionals, managing secure access to the company’s databases is a challenging task. You need to manage user permissions and authentication, as well as inevitable requests for temporary access for staff members and third-party vendors. These requests create an additional burden on your team, but ensuring controlled access to MySQL can be a straightforward process if you know how to do it correctly. In this blog post, we’ll discuss best practices for granting temporary MySQL access in an efficient and secure manner using Apono. We’ll talk about why it’s important that Temporary Access is properly managed, guidelines on which users should receive temporary credentials and how long the temporary credential should remain active for.


Using Apono To Provide Temporary Access to MySQL

Your first step in create an Apono account, you can start your journey here.

Follow the steps at our MySQL Integration Guide.

Now that Apono is set you can start creating Dynamic Access Flows:

  • Automatic Approval Access Flows – Using admin defined context and pre defined role to provide automatic access to MySQL resources.
  • Manual Approval Access Flows – Using admin defined context and pre defined role to provide automatic access to MySQL resources.


Using Apono declarative access flow creator you will be able to simply define:

  • Approvers
    • User Group (round-robin)
    • Single User
    • Automatic – Contextual
  • Requesters
    • User Group
    • Single User
  • Resource
    • Single Resource
    • Pre-Defined Resource Group
    • Partition of a resource
  • Duration
    • By Hours
    • By Days
    • Infinite

Example: MySQL Automatic Approval Access Flow:

Example: MySQL Manual Approval Workflow:


Streamlined Access. Frictionless Security.

With Apono, companies satisfy customer security requirements and dramatically reduce attack surfaces and human errors that threaten commerce. Apono liberates DevOps teams to deliver more for customers and the businesses without delay.

How streamlining access leads to productive development teams

Does your access management hurt your team’s productivity? It does.

How do we know? Let’s look at the data.

Access and productivity in numbers

The average employee has 191 passwords to keep track managing all those different usernames and passwords is a huge time suck. There’s no denying it: having to constantly remember a jumble of passwords is a productivity killer. A recent study found that the average employee spends over 10 hours in their work year simply inputting passwords. Add to that the time required to reset forgotten passwords, and you’re looking at a serious drag on productivity: the estimated cost of lost productivity per organization averages $5.2 million annually.

But it’s not just the time spent managing passwords that hurts productivity—it’s also the time spent waiting for access to the systems and data your team needs to do their jobs. In fact, 66% of employees say they’ve wasted time at work waiting for someone to give them access to something. And one-third of technical employees of IT professionals say that restrictive access causes daily (31.8%) and weekly (32.3%) interruptions in their work.

These interruptions quickly snowball into missed deadlines and frustrated workers. 52% of development teams have missed deadlines due to a lack of access to the needed resources and infrastructure.

For example, imagine this common scenario: a developer needs to access a Kubernetes cluster to work on an application, but they can’t log in. Their manager, who normally provides access, is on PTO abroad with spotty reception. They have no choice but to send a request up the chain manually and hope for the best, which results in losing hours or even days on a project simply waiting for access to a resource.

If this sounds familiar, your company isn’t alone—in fact, 64% of businesses have experienced financial losses due to access management issues. Missed deadlines and extended projects often result from inefficiencies in access management.

And it’s not just the users who are affected: help desk employees spend nearly 30% of their time resetting passwords. That’s valuable time that could be spent on other tasks.

Access and security in numbers

A record number of data breaches in 2021—1,862 to be exact—cost companies an average of $4.24 million each. According to Verizon, 61% of all company data breaches and hacking incidents result from stolen or compromised passwords, and it’s not hard to see why.

When employees lack seamless access to systems, it not only affects productivity but also company security. 

Technical employees need access to do their job well, but they’re not always given that access. To do their jobs, technical teams often find creative ways around the access roadblocks by resorting to methods such as password reuse, shadow IT, sharing credentials, or keeping backdoor access. In other words, when employees can’t get the access they need to do their job, they find ways to get it themselves—even if that means going around company policy.

These workarounds might help the technical team finish their tasks and knock down some Jira tickets in their queue, but it also exposes the company to security risks. A recent study found that 8 out of 10 hacking incidents were due to shared passwords, and even more alarmingly, 53% of employees have admitted to sharing their credentials.

Passwords are proliferating across our digital world and getting stolen in record numbers every year. Consequently, it’s no mystery that over 555 million passwords are accessible on the Dark Web, leading to credential-stuffing attacks that account for a majority of data breaches in recent years.

Streamlined access is key to both productivity and security

The bottom line is this: if you want to improve productivity and security, you need to give your technical teams seamless access they need to do their job.

Now that we’ve established that access is key to productivity and security, let’s look at how you can streamline access and get your team back on track.

That’s where Apono comes in. 

Apono.io is an innovative identity and access management solution that gives your technical teams the access they need — without sacrificing security.

Apono streamlines access by automating the process of granting and revoking permissions, so you never have to worry about manually managing access again. Our technology discovers and eliminates standing privileges using contextual dynamic access automation that enforce Just-In-Time and Just-Enough Access.

Streamlining access also makes it easier to meet auditing and compliance requirements. With Apono, you can see who has access to what, when they accessed it, and from where.

With Apono, It is now possible to seamlessly and securely manage permissions and comply with regulations while providing a frictionless end-user experience. Plus, Apono integrates with popular applications like Jira, Slack, and Google Workspace, so you can manage access from one central location.

With Apono.io, you can:

  • Automatically grant and revoke access for a seamless user experience
  • Enforce least privilege and separation of duties for better security
  • Monitor user activity and ensure compliance

And much more!

It’s simple to use and easy to set up, so you’ll be up and running in no time. Stop wasting time on access issues and start improving productivity—and security—with Apono.io today.

DevOps Expert Talks: Ask Me Anything With Moshe Belostotsky

In this Q&A session with Moshe Belostotsky, Director of DevOps at Tomorrow.io, we dive into the changing role of DevOps and how security considerations are changing the way software is being built and delivered.

Q: First of all, if you can tell me a little about yourself, what brought you into DevOps?

A: “I was in the world of DevOps even before it was called DevOps and before the Cloud became a thing. Ever since I can remember, I have been doing automation, CI/CD, treading this line between infrastructure automation and enablement, automatic tests, and later on, the Cloud.

I started working with automation at the age of 16 and have been doing it ever since with a 4-year break during my army service, after which I jumped right back in.

Q: What do you like the most about working with DevOps automation?

A: “A couple of things.

First, it’s the variety of work: the number of touch points with the platform, with the different teams, and sometimes with the customers. At its core, DevOps is about collaboration. It’s about breaking down silos between development and operations teams so that they can work together to deliver software faster and more efficiently.

Second, it’s never-ending problem-solving. You are always looking for ways to optimize processes, increase the velocity and optimize the way developers work. It’s also about the efficiency and stability of the production environment.

In a way, being in DevOps allows you to see a bird’s eye view of the entire system. What makes this role very interesting is not being limited to a single domain.

Q: What advice can you give to somebody who is just starting in DevOps?

A: “As an autodidact, I can say that the first thing to know is that you don’t know anything. That’s the baseline and the starting point. And the second thing to realize is that you can solve anything.

Once you know that everything is solvable and that you don’t need to panic when you don’t know how to solve something because you can always gather new knowledge, you can start enjoying the process of problem-solving and optimizing.”

And last but not least, understanding the developers and how they think, and how we can add value by translating the infrastructure to them.”

Q: What do you think makes a good DevOps engineer?

A: “A person with a can-do attitude, a people person, who is always learning, and a problem-solver.

Someone who has that basic understanding that everything is solvable and that we should not take for granted anything at all. Someone who strives to help the developers and understands that we’re here to communicate with people and solve their problems, not just communicate with the computers.”

Q: As a director of DevOps, what are your priorities?

A: “MTTR, MTBF, and LTV, so mean time-to-value, mean time between failures, and mean time to recovery. Those are the measurable KPIs to focus on. And, of course, cost efficiency.”

Q:  As a DevOps leader in your organization, what role does security play in the decisions you make?

A: “Very important. I work closely with the security team.

Collaboration is key. As DevOps, we need to create a single language with the security office. Because eventually, we aim for a single goal – for the company to be successful, to grow, and to avoid security incidents, especially public incidents. These will undeniably be very bad for the company and very bad professionally for all involved. We never want to be in this situation.

But also an important part of DevOps is the developer experience. So when we apply security measures and security restrictions on production environments, we still need to maintain the mean time-to-value KPIs.

So when the developers can’t do their work or have to go a much longer road when trying to achieve their goals, we hurt the company, although we increase security.

If the developer cannot view his environment in production, you cannot access these environments in production, doesn’t have any breaking glass protocol, the recent environment in production, then we hurt mean time to value, and mean time to recovery, which eventually will hurt the company. Although our security is great, we will be out of business.

So balancing developer experience with security is something we constantly have to focus on as DevOps.

Q: As DevOps, what’s the worst ask you get from other teams?

A: “Friday afternoon, a developer decided that he has some spare time to develop. He encounters an issue, and he’s starting to send messages in the DevOps channel.

The channel has two functions; we use it both for standard requests and for urgent requests. So we are always monitoring those channels. And those requests, especially when they’re ambiguous but turn out to be non-urgent, should really wait till Monday morning.”

Q: How can organizations assist their DevOps engineers to be more successful in their jobs?

A: “First is creating the space for and facilitating learning. Most of the DevOps teams are understaffed. And we don’t have time for learning, upskilling, going to meetups, and taking courses. To make the learning part of the job description.”

Q: What would you think is the next big change in DevOps?

A: “I think the two trends to be aware of are serverless and shift-left.

DevOps will require more and more coding skills. We will need to do more and more coding and less infrastructure maintenance. That is why we in DevOps always need to learn and adapt.”

Moshe Belostotsky is the Director of DevOps at Tomorrow.io. With nearly two decades of experience in the field, Moshe is one of the leading minds in the startup nation’s DevOps community. Having worked with companies such as Cisco, Hewlett-Packard, and Fiverr,  Moshe has a wealth of experience in the field. In his current role at Tomorrow.io, he is responsible for managing the entire DevOps department and ensuring that the company’s products are released on time and meet customer expectations. In addition to his role at Tomorrow.io, Moshe is the in-demand thought leader in the DevOps community and frequently speaks at industry events.

The Uber Hack – Advanced Persistent Teenager Threat 

Uber, the ride hailing giant, confirmed a major system breach that allowed a hacker access to Vsphere, google workplace, AWS, and much more, all with full admin rights. 

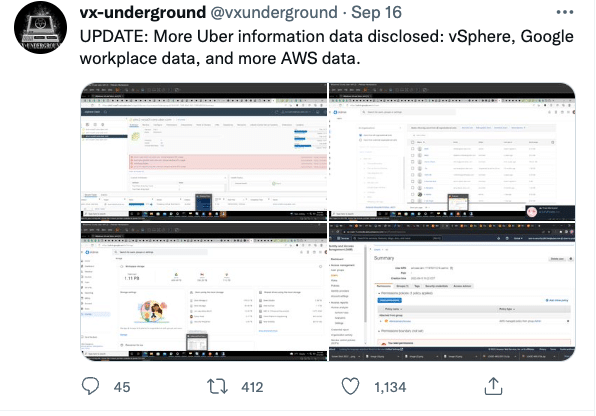
In what that will be remembered as one of the most embarrassing hacks in recorded history, the hacker posted screenshots to the vx-underground twitter handle, from the console of the hacked platforms as proof, and included internal financial data and screenshots of SentinelOne dashboard.

If you are going to hack a role, choose “Incident response team member” for optimal results

Before we dive into the “how”, let’s first explore the role of an Incident Response (IR) team member. When an incident (hack, production failure…) occurs, the incident response team are the company’s “first responders”, when there is a fire, they are the “firefighters”. Due to the importance of their job, IR teams get an unprecedented level of access, usually when they are on-call – making them an ideal target.   

Zero Trust vs “Uber” Trust 

The hacker, who either targeted the IR team or stumbled upon it by chance, was able to socially engineer a member of the IR team utilizing a technique known as “MFA Fatigue” – bombarding the user with 2nd factor approval requests. The hacker proceeded to contact the IR team member via WhatsApp, posing as an Uber IT support rep. He then claimed the requests will end upon approval and that the IR team member simply needs to approve the login to end the flood of requests.

Following the approval, the hacker was able to enroll his own device as a 2nd factor, giving him everything needed to login to the rest of the applications in the environment.
  

When the hacker was able to access Uber’s internal network, he located a shared folder containing a powershell script with admin credentials and used them to obtain access to the company’s Privileged Access Management (PAM) platform, thus gaining access to Uber’s entire network.

While the principals of “Zero Trust” call to reduce attack surface by segregating networks, apps and access to avoid?, Uber’s architecture provided the user with “Uber” rights. 

The hacker path:

Social Engineering  => DUO MFA => 2nd factor approval =>Added Device to 2nd factor=> VPN access => Viewed internal network => Powershell script with privileged credentials => Access to PAM => GOD_MODE

Centralized Authentication: 

The fault to this ordeal is an inherent one, and a part of every centralized authentication, lets elaborate a bit: back in the day we used to manage credentials per application or data repository, a breached identity “Attack Surface” would apply only to a single applications; a 1:1 attribution between identity and action, but we had to manage a lot of credentials. 

This method was decentralized by nature, from a scalability aspect an impossible task. 


To circumvent the scalability issue we created Identity Providers (IDP) a centralized approach that enabled us to share an identity across applications, using a single set of credentials, increasing our potential attack surface across the organization, understanding this risk we added authentication factors, each with its own flaws. 

The tradeoff between decentralized authentication and IDP led to better scalability, user experience and answered operational needs, it also led to hacks just like the Uber Hack, Centralized Authentication = Once you are in you are in, have fun! 

What can we do? 

But Uber did have a DUA MFA! And SentinelOne! So what did they do wrong? 

Nothing really, they followed industry standards, the problem is that these standards will not protect you once a hacker is in. 

Decentralized authentication is not coming back, nor should it! But what if we took a different approach and decouple authorization from authentication by using dynamic access policies, instead of just adding authentication factors, we can add authorization factors according to risk.

This model (shown above) treats authorization as a dynamic factor that correlates with the “risk circle” adding authorization factors that will provide an extra level of assurance both in verifying the user and preventing human errors caused by standing privileges

In Apono we solved this issue by enabling users to bundle permissions and associate them with users, creating Dynamic Access Flows that connect the risk circles above adding Multi Factor Authorization into the access policy.  

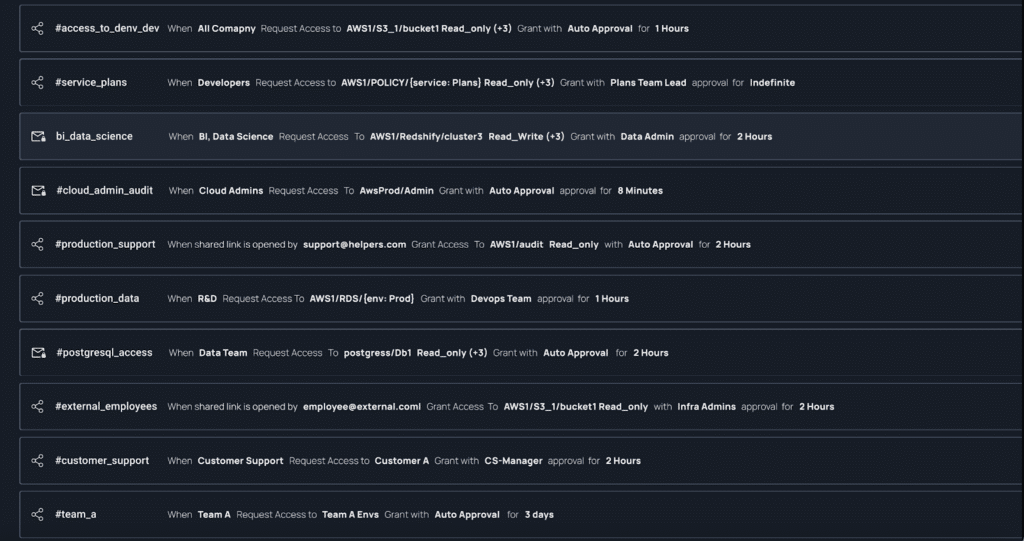
Each circle of risk is represented as a permission bundle, to each the admin can create a policy that combines different authorization factors, and a time frame for the access: 

  • User Justification – User must write a reason for needing access 
  • User + Admin Justification – When an access request is created both the requester and admin need to provide a reason to the approver.
  • Owner Approval – Access will be granted when the owner of the groups of permissions approves it 
  • IDP Owner Approval – Only when IDP owner approves the request the access will be granted 
  • Restricted Timely Access – Access is only open to a defined period of time, automatically revoked upon the end of the defined period 

With Apono you will be able to create Declarative Access Policies, defining authorization factors using our declarative access flow wizard 

Using Apono’s Declarative Access Flow Wizard you will be able to create access flows with an array of authorization factors, approver groups, two-step human authorization.

Effective Privilege Management in the Cloud – Mission Impossible?

TLDR: Overprivileged access is a natural consequence of manually granting and revoking access to cloud assets and environments. What DevOps teams need are tools to automate the process. Apono automatically discovers cloud resources and their standing privileges, centralizing all cloud access in a single platform so you don’t have to deal with another access ticket ever again.

How much access to cloud resources do your developers really need?

In the ideal world, you would give access to whoever needs it just for the time they need it, and the “Least Privilege,” (meaning both “Just-in-Time,” and “Just Enough”) access policies would be the norm.

But we don’t live in an ideal world.

Cloud infrastructure is dynamic and constantly changing. Some resources, such as cloud data sets, may include more than one database, each with its own set of access requirements. For example, a user could require read/write rights for one and read-only rights for another.

In theory, you should keep track of all these access rights and revoke and grant them as needed. But in practice, we don’t have the tools to automate cloud access management, which leads us to give more access than we should.

What is overprivileged access?

Overprivileged access is when an identity is granted more privileges than the user needs to do their job. In the cloud, this happens all the time.

For example, a developer needs access to an S3 bucket for a couple of hours each Monday in June to do some testing. After they are done, they won’t need that access again until a sprint with a task requiring it comes up.

If you were to go by the book, you would need to manually give them access and then manually revoke it on Mondays for four weeks.

This is simply not sustainable. The ratio between DevOps and engineers is already 1 to 10, and It’s not possible for DevOps engineers to be constantly dropping what they are doing to provision or revoke access. We’ve got other stuff to do.

When a developer needs access to a sensitive S3 bucket that contains customer data, it’s often not clearly defined what permissions will be enough for the user to do their job. We address this problem by providing more access than we should in order to avoid becoming a bottleneck. As a result, the whole role gets over-privileged permissions. What we’re left with, is an Overprivileged Role Level Access that affects a large number of users, and is not likely to ever be revoked.

Another common way overprivileged access creeps into your cloud stack is when “Read/Write” access is granted to users who need only Read rights for a limited time. An overprivileged identity with Write access can do great damage if it’s compromised.

To make matters worse, managing access is kind of dull. Nothing is less exciting than dealing with another access ticket. Managing access is the task you want to get over with as quickly as possible.

Without automation, it’s impossible to implement granular access provisioning, revoke access in a timely manner, or even just keep tabs on existing policies. And that, folks, is how overprivileged access to cloud resources became the norm.

Why overprivileged access is a problem

Today, overprivileged access is everywhere. And it’s a serious problem for several reasons:

1) Attack Surface = Permissions x Sensitive Cloud Resources

Overprivileged access is one of the biggest security risks in the cloud. In recent years, the vast majority of breaches (81%) are directly related to passwords that were either stolen or too weak.

But it’s not just about passwords. It’s about the way cloud resources are accessed and used.

Overprivileged access significantly increases the blast radius of an attack. When an attacker obtains a set of valid credentials, the permissions linked to those credentials determine what they can and cannot do in your environment.  The more permissions a compromised identity has, the bigger the attack surface.

In the cloud era,  permissions are your last line of defense: the right permissions are what prevent unauthorized identities from accessing your company’s sensitive data. Therefore, tailoring access to the task at hand will drastically reduce the risk.

2) Complexity & Lack of Visibility

Another issue with overprivileged access is that it makes cloud environments more complex than they need to be. When everyone has full access to everything, it’s very difficult to keep track of what’s going on.

This can make it hard to troubleshoot issues, diagnose problems, and comply with regulations.

The harm that can come from overprivileged access is not coming just from malicious actors. All humans make mistakes, and your employees are human.

3) Mistakes will happen

According to 2022 Data Breach Investigations Report, human error is to blame for eight out of 10 data breaches. Overprivileged access significantly increases the risk of such mistakes and the resulting fallout.

The burden of access management falls onto the DevOps teams.

Traditionally, access management has been the domain of IT security, but as cloud adoption increased, the burden of managing cloud access has fallen upon the shoulders of those responsible for the cloud infrastructure.

More and more DevOps engineers are finding themselves in charge of their organizations’ access management policies.

In today’s public cloud reality, provisioning of access is becoming an ever more important part of DevOps engineers’ day-to-day work.  And that’s where the balancing act begins:

  • You want to give developers the freedom to work on whatever they need to get the job done.
  • You know that overprivileged access is a dangerous thing, but you can’t spend every hour of every day stopping what you are doing to give and then revoke access to cloud resources.

A cloud-native approach to access provisioning

Moving to the cloud is a transition towards a more agile way of working, which necessitates a subsequent shift to dynamic permission management.

So what are we to do?

The answer, as with most things in a DevOps engineer’s life, lies in automation. We need to find a way to automate cloud access management so that DevOps engineers can focus on their actual jobs and not spend all their time managing access.

We need a tool that is:

– Easy to use

– Scalable

– Seamless

And that is where Apono comes in.

Apono simplifies cloud access management. Our technology discovers and eliminates standing privileges using contextual dynamic access automation that enforce Just-In-Time and Just Enough Access.

With Apono, It is now possible to seamlessly and securely manage permissions and comply with regulations while providing a frictionless end-user experience.

Are you ready to never have to worry about cloud access provisioning again? Get in touch with us today.