Permission Control for Third Parties
Table of Contents
For years, organizations have recognized the importance of closely managing employee access using identity governance and administration solutions. More recently, they have come to realize that the same level of governance is essential for non-employees as well.
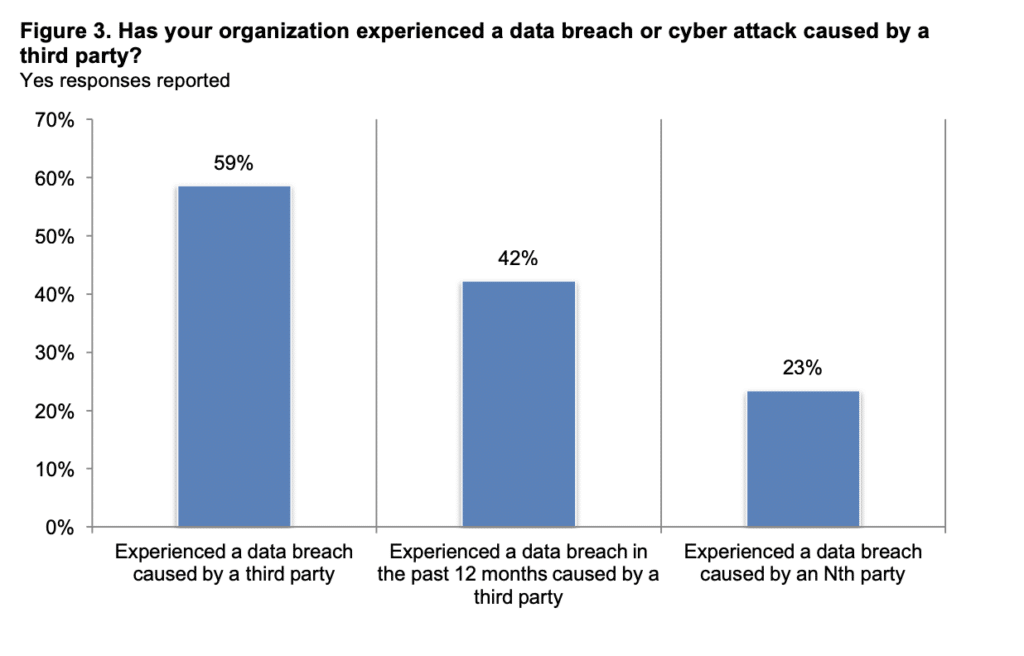
A study sponsored by Opus and conducted by Ponemon found that 59 percent of companies reported data breaches caused by their vendors or third parties, many of which went unnoticed.
With the increasing prevalence of third-party cybersecurity incidents, the management of non-employee access has become more critical than ever. How can organizations ensure that non-employees can access the necessary resources to perform their duties while maintaining sufficient restrictions to prevent security risks?
Cyberattacks through an organization’s vendors or suppliers
Organizations are dependent upon their third-party vendors to provide important services such as payroll, software development or data processing. However, without having strong security controls in place, vendors, suppliers, contractors or business partners can put organizations at risk for a third-party data breach.
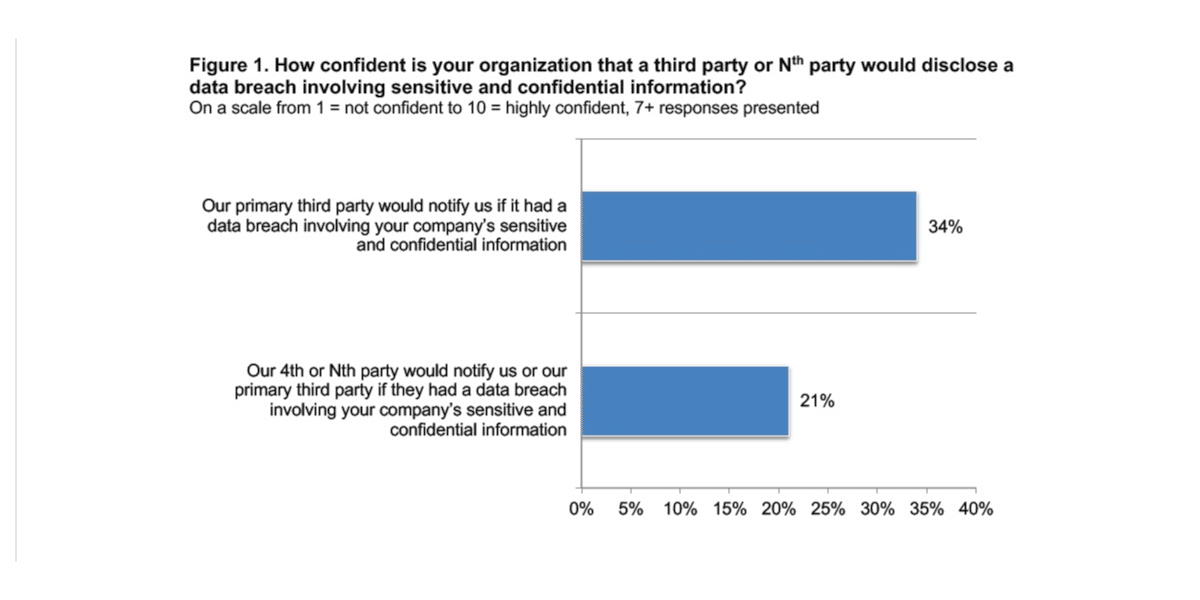
In addition, cyberattacks through an organization’s vendors or suppliers are greatly underreported. According to new research from Ponemon Institute and Mastercard’s RiskRecon, only 34% of organizations are confident their suppliers would notify them of a breach of their sensitive information.
Why is permission control for third parties so complicated?
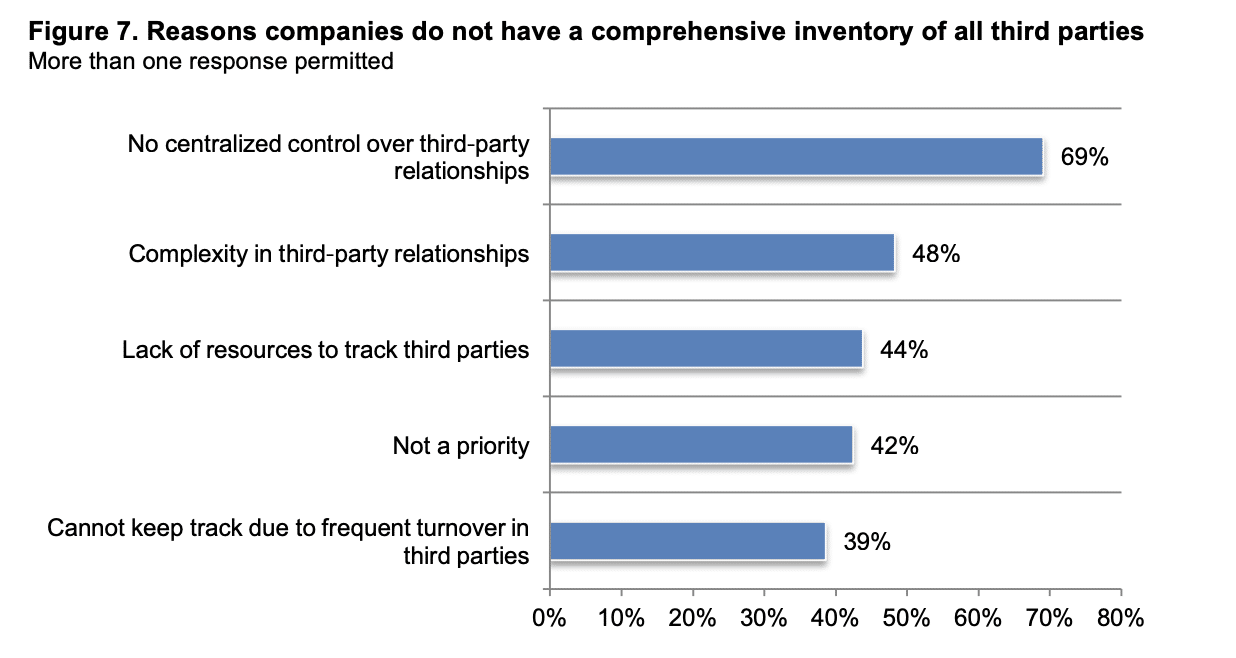
Companies are progressively relying more on third-party collaborations, sharing confidential and sensitive information with an average of 583 third parties. However, just 34 percent maintain a comprehensive record of these third-party relationships, with an even lower percentage, 15 percent, doing so for Nth parties. The primary reason, cited by 69 percent of respondents, for this lack of comprehensive inventory is the absence of centralized control. Other significant factors include a shortage of resources and the intricate nature of these third-party partnerships.
Moreover, less than half of all companies consider the management of risks associated with third-party relationships as effective and a top priority within their organization. A mere 37 percent claim to possess sufficient resources for managing these relationships, and only 35 percent rate their third-party risk management program as highly effective. Additionally, over half of the companies are uncertain whether their vendor safeguards are adequate to prevent a breach.
“The third-party ecosystem is an ideal environment for cyber criminals looking to infiltrate an organization, and the risk only grows as these networks become larger and more complex,” said Dov Goldman, VP, Innovation & Alliances of Opus. “To stay ahead of the risk, companies and executives need to collaborate around plans for third-party detection and mitigation that supports automated technology and strong governance practices.”
No centralized control over third-party relationships
Because accountability for the third-party risk management program is not centralized
within one function, it can create a barrier to having a comprehensive inventory of all third
parties. In the Ponemon study, only 34 percent of respondents say they have a comprehensive inventory of all their third parties. Of these respondents, 69 percent of respondents cite a lack of centralized control over third-party relationships as to why they do not have such an inventory. Almost half of respondents (48 percent) say complexity in third-party relationships is a barrier, as seen in the graph below.
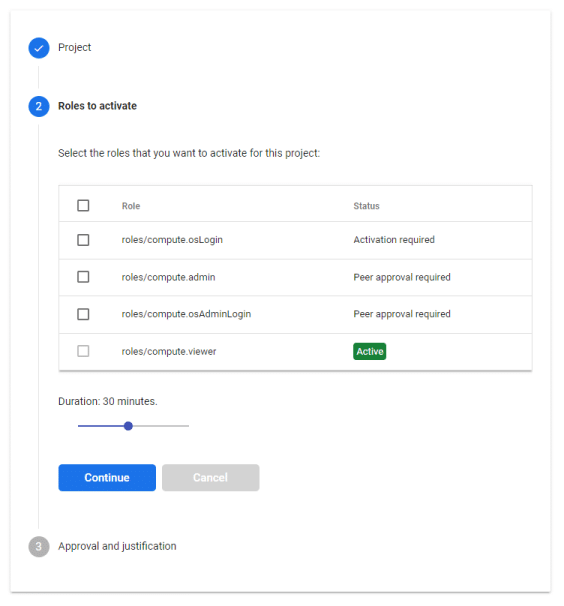
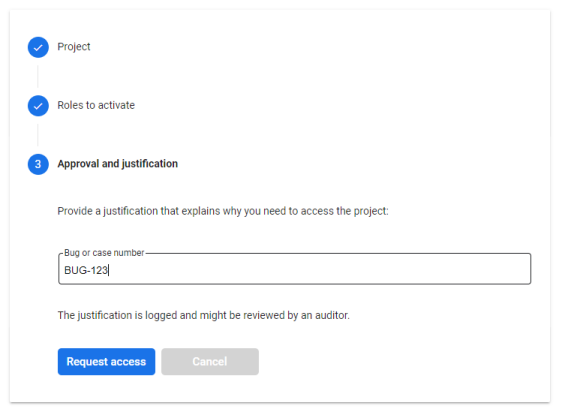
You absolutely need to apply granular access controls around vendor access to enforce least privilege and meet many compliance requirements. You absolutely need to ensure best practices like password management and session auditing are implemented. These security controls are essential to mitigating the most common and dangerous vendor access attack vectors.
About Apono, Permission Control for Every User
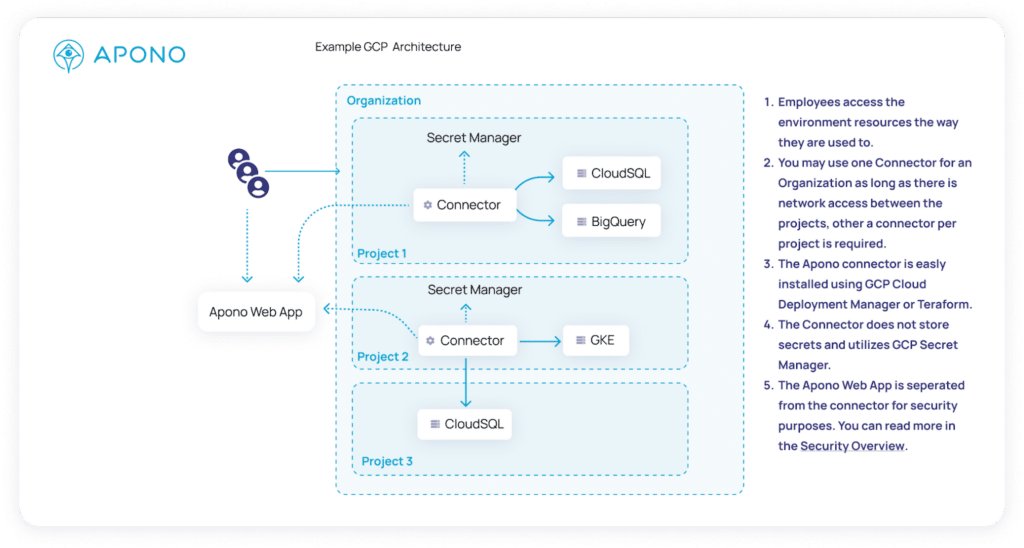
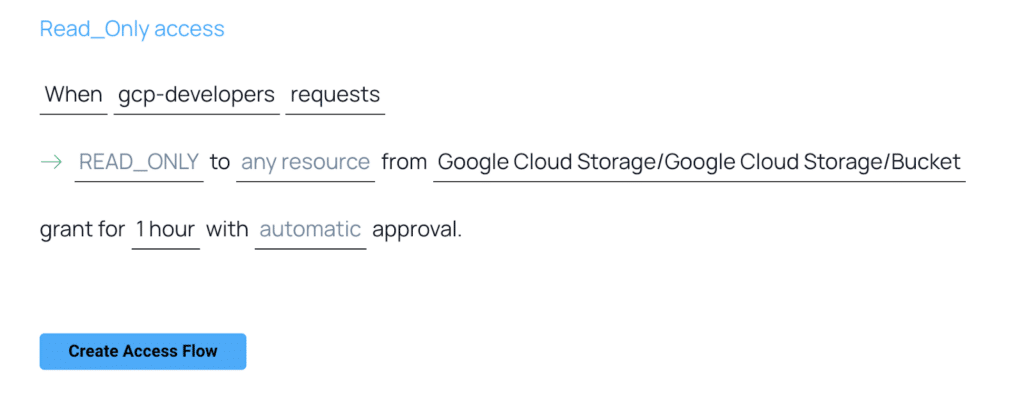
Apono is a granular permission control solution that offers fine-grained access policies to cloud assets. Apono integrates directly with the specific service or resource type. This allows us to change the permissions at the resource level itself, for example a specific collection or table in your data repository instead of the entire cluster. Our solution allows for control of specific roles and permissions of each resource type and service from one central tool, bringing a unified privilege control plane to the admin, with workflows and audit capabilities on top.